


 Olahraga

 Meditasi


 Siniar
 Buku elektronik


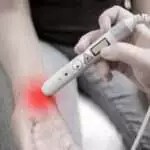
A common athletic injury Mallet finger, also called as baseball finger. This injury can also be caused by a crushing accident at work or due to a severed finger while working in the kitchen. Any fast motion that jams the tip of the finger against an object can cause a mallet finger. Usually, the index finger or middle fingers are mostly affected by the condition. So, for effective relief in this case we will tell you some amazing mallet finger exercises.
Signs And Symptoms.
Mallet finger symptoms may include pain, tenderness, and swelling in the outermost joint immediately after the injury. Swelling and redness immediately after the injury and the inability to fully extend the finger, but the person can move the finger with support.
What Causes Mallet Finger?
The mallet finger occurs while the outermost (end) joint of the finger is injured. With the mallet finger, the tendon of the back of the finger (not on the palm side) is separated from the joint. There are usually three types of injuries
1. When the tendon is damaged, but there are no fractures or broken bones.
Cerita Terkait
 34 Situs Web Kesehatan dan Kebugaran Terbaik untuk Membantu Anda Mendapatkan Bentuk Tubuh Ideal
 5 Tips Latihan Tangan Bebas Terbaik untuk Pemula
2. When the tendon is broken with a small fracture that is caused by the force of injury, and
3. When the tendon ruptures with a large fracture.
Home Remedies of Mallet Finger.
Apply ice on the joint of the injured finger to reduce swelling and tenderness. Wrap the ice in a towel. Do not apply ice directly to the skin. A bag of frozen vegetables wrapped in a towel also gives comfort.
Make sure that the finger does not hurt too much.
If there is cut also, clean that area with running water, then wrap the finger with a clean mist or cloth. Apply moderate amounts of pressure to prevent bleeding.
Why Exercise Is Important?
The balance between rest and movement is extremely important while recovering from an injury. Without doing any movement and after wearing a finger splint, you may experience excessive stiffness and loss of hand strength, making it a long and difficult way to recovery.
When To Start Exercising After A Mallet Finger Injury?
You’ll have to wait to start specific mallet finger exercises until your finger tissues are almost completely healed, with splintering, and when you get a nod from your doctor (especially after surgery).
Some signs you’re ready often include:
- No evidence of swelling or pain.
- Normal resting position for the tip of the finger (usually about 4 to 6 weeks).
- Exercises of unhurt fingers, hands, wrists, elbows and even latihan bahu do not cause any additional pain or swelling.
Mallet Finger Exercises That Help In Recovery.
These 6 mallet finger exercises will proceed from gentle passive stretching to more active arm movements. Start at the beginning and progress it by adding the next exercise when you feel ready. Use your symptoms as a gauge and never force or put pressure any of these moves.
1. Finger Extension Stretch.
One of the first mallet finger exercises you can start with is a gentle stretch in finger extension. Right after the injury, the finger will be resting in flexion and will be unable to enlarge the distal (last) joint on its own. Thus, you can facilitate this movement and border with the opposite hand. This will help to reduce the loss of the range and keep the fingers flexible when it heals.
- Hold your affected hand in such a way that the palm is facing downwards.
- Place your opposite hand around the last joint (outside) of your injured finger.
- Your thumb should be just below the joint, supporting the index finger & the other finger fully.
- If you’re having trouble relaxing your hands and fingers, try to sit down and prop your whole hand to rest on a table.
- Gently push the tip of the finger towards the ceiling while keeping the rest of the finger still with the thumb.
- Go as far as convenient without pain.
- Pause for 20+ seconds for 2-3 sets.
2. Extensor Tendon Glide Exercise.
After spending a long time in the splint, the healing finger extensor tendon will feel stiff. A tendon glide exercise can help the tendon to move smoothly with less stiffness or grip during daily activities.
As you prepare, there are many different options and conditions to move forward. We will focus on demonstrating the practice first. Then you can move on to further options as tolerant.
- Keep your hand with your front fingers towards the ceiling and as straight as possible.
- Make the shape of a “duck” bill with your fingers and thumbs while keeping the joints of fingers and thumbs straight, while you only lean on the knuckles.
- Bring the palm of the thumb and fingers closer to each other without pain and avoid bending of the distal and proximal interphalangeal joint (PIP).
- Hold the position for 5-10 seconds for a total of 10-15 repetitions.
3. Power Squeeze.
Video Source: Therapy Putty Exercise: Power Squeeze
As your flexibility and comfort improve with moving your finger, it’s time to get started with some basic strong moves. This is one of the simplest exercises you can start with is a full-hand-holding exercise.
You can see that your broken finger is stiff at first, start in a series of motions that are comfortable and progress as it endures. Until you have gained more strength, you may need to initially direct your finger to the folded position with your opposite hand.
- Take some putty, a hand exercise ball, or anything else you can squeeze.
- Hold the instrument of your choice in the palm of your affected hand.
- Wrap all the fingers and thumbs around him.
- Squeeze the ball into your hand when you try to curl your fingers more.
- Pause for 5 seconds for 10 repetitions, a total of 2 to 3 times.
- Increase the intensity of your grip, the difficulty of the putty or ball (if applicable), and the speed of the finger’s flexibility as you bear.
4. Full Finger Spread.
Video Source: Therapy Putty Exercise: Full Finger Spread
This exercise is similar to the finger extension exercise, except that it works the whole hand together. Working on coordinating all the extensor muscles of the arm and forearm together will help you to build functional strength to get back to daily activities and games.
- Take a small resistance band or putty (rotated in a circle).
- Bring all your fingers and thumbs together in the center of your hand.
- Wrap the putty or band around your fingers between the middle joint and the end of the finger.
- Stretch all the fingers and thumbs away from each other as far as possible, pushing the resistance again.
- Keep the joints of the fingers straight as you stretch your fingers separately and enlarge what you can bear.
- Pause for 1-2 seconds and repeat for 10 repetitions, a total of 2-3 sets.
For the advancement, you can try strong resistance from a band or putty, otherwise you can also try ring gripper or hand extension exerciser. (Note that you will not be able to meet the full finger range of motion with this option).
5. Fingertip Pinch.
Video Source: Therapy Putty Exercise: Fingertip Pinch
An important next step in the rehab process is to be able to pinch your fingers together properly. When pinching you need to have good strength and balance between the finger flexor and the extensor tendon. Without such balance, it will compromise the integrity of the joint of the fingers with daily use and lead to problems in the future.
- Take putty or a small towel to pinch and sit on a chair near a table.
- Roll the putty or towel into a narrow cylinder and place it on the table in front of you.
- Place your thumb & affected finger around the cylinder to pinch.
- Pinch the thumb and finger together while focusing on having an “O” shape with the fingers (don’t let the joints of the finger flatten or extend).
- Pause for 3-5 seconds for 10 repetitions, for a total of 2-3 sets.
- You can also complete this exercise for your unaffected fingers.
- To make progress, increase the intensity, increase the strength of the putty, or hold the ring gripper.
6. Finger Extension.
Video Source: Therapy Putty Exercise: Finger Extension
This exercise directly addresses the healing finger tendon. Thus, start slowly and see how your finger tolerates this step first. That’s why this is one of the last tricks you’ll try in your rehab program.
- Sit comfortably in the chair and place your hand down on the palm of the table.
- You can start without any resistance or hold some finger putty or a small resistance band (such as the original rubber band).
- Without resistance, extend the entire injured finger towards the ceiling while keeping the joints of the finger straight.
- With resistance, place a rolled string of stripes or bands around the affected finger between the middle and top joint (this time your forearm rests on the table).
- As far as you can go comfortably, move the whole finger backwards against the resistance.
- Repeat 10 times for 2-3 sets.
- Make progress by increasing your hold time or resistance tingkat.
Useful Exercise Tools.
All the exercises listed above, and any other tricks you make ahead, are easy to do with the help of hand therapy devices. It’s easy to take these tools anywhere with you and use them to stretch and strengthen your fingers on the go or when you have free time. These top rated tools have already been discussed in the exercises above and include;
1. Hand Exercise Balls.
Hand exercise balls are one of the great addition to your hand exercise tool kit. They come in a variety of colors that vary in resistance, it depends on the strength of your hand and where you are in your recovery journey.
You can keep one in your bag or car and use it to keep your hand strong throughout the day. In addition, squeezing a ball will boost circulation to enhance the healing process and also reduce overall pain.
2. Therapy Putty.
The use of putty is a very versatile tool to strengthen the hands and fingers. The ways you use it are practically endless. It also comes in a variety of strengths that you can use with your rehab program.
Many people also find the use of putty therapy for their brains. One disadvantage with this is that when you want to increase the endurance of your hand with high repetition and you have to constantly manipulate the putty for use between every single repetition.
3. Ring Gripper.
The ring gripper can be considered a cross between exercise balls and therapy putty. It is more versatile than the ball but slightly less versatile than putty. Outside of hand-hold exercises, this device should be reserved in the rehab process later ecause it is less flexible and offers more resistance.
Thus, it’s a great tool that you can start with holding onto in early rehab and then build more extensive exercises with tolerant time.
More Treatment.
As always, if you experience a sudden change in symptoms or they are not recovering on their own within a week or two, it is time to contact your healthcare provider as soon as possible for further medical advice and treatment. They may need to dismiss more serious issues such as fractures (known as bony mallet finger).
Intinya.
The above motioned mallet finger exercises are most effective when you practice those with correct procedure. However, you can seek medical treatment based upon your severity.