


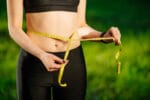


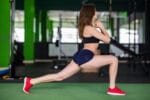


Due to today’s modern and unhealthy lifestyle, mankind suffers from a lot of diseases. Which also includes obesity. Increasing the amount of fat in the body not only makes the body obese, but also weakens the body internally. Regular practice of yoga will make you the owner of a beautiful body by reduce the belly fat, that you have never imagined in your dreams.
Which will not only look beautiful but also be internally healthy. If you want to live a long, healthy and good life, then you have to take care of your body and always be constantly aware of it.
In the past, the problem of obesity was very low because people were doing too much manual labour. Women were rising early in the morning, from sowing of wheat to sowing cows, some manual labour, so they never had fat problems.
But the time has changed, people’s lives have changed, the workload on people has also increased and lifestyle changes have come and the same lifestyle has reduced the physical exertion in our day to day life.
Related Stories
 10 Best Morning Yoga For Weight Loss
 Atha Yoga Anushasanam: Meaning, Benefits and How To Do
Today we are going to tell you some simple yoga postures that keeps your body healthy, beautiful and balanced, making the shape of your waist, stomach, thighs and hips beautiful.
In many scientific researches, it has been confirmed that obese persons are manifold at risk of having diseases such as diabetes, heart disease, stroke, arthritis, hypertension and cancer.
No, our aim is not to intimidate you, but to alert you. In this article, we have come up with a solution of this problem. Here we will talk about yoga to reduce the stomach and especially the waist, stomach, thigh and hips, whose regular practice can not only reduce obesity, but also relieve other diseases.
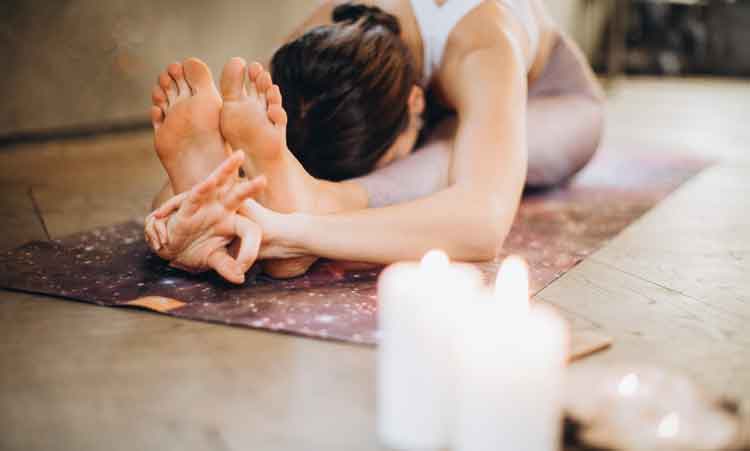
Yoga To Reduce Belly Fat With Pictures.
- Tadasana or Mountain Pose.
- Surya Namaskar or Sun Salutation Pose.
- Naukasana or Boat Pose.
- Ardha Chakrasana or Standing Backward Bend.
- Chakki Chalnasana or Mil Churning Pose.
- Shavasana or Corpse Pose.
It is compulsory to do all the yoga postures in one order. It should be started with the standing postures. After that, yoga is done by sitting and then lying down. We are also telling you yoga in that order and you will do them in that order. As a result you will get more health benefits.

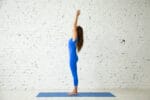
Tadasana or Mountain Pose.
It is necessary to practice this posture before starting yoga. It stretch your whole body and provide you more energy as well as it gives you better blood flow.
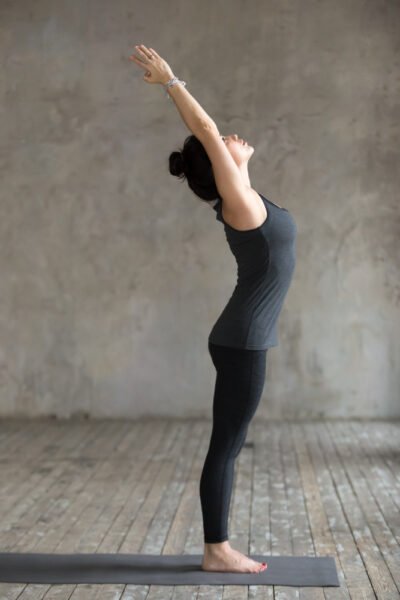
How to do Tadasana or Mountain Pose?
Step 1.

First stand upright and keep your legs, waist and neck straight.
Step 2.
Now move the fingers of the hands over the head and drag the whole body upwards with deep breath. Palms should be in the direction of sky.
Step 3.
Also lift the ankles up. The balance of the whole body should come to the toes.
Step 4.
In the meantime, feel the stretch from the toes to the top hands. Stay in this state for a few seconds and keep breathing and leaving at normal speed.
Step 5.
Then, gradually, come to the first position. At least two-three cycles can be done at once.
Advantages of Tadasana.
- Doing this yoga reduce the excess belly fat as well as other fat which deposited throughout the body.
- The body became curvy and starts to shape.
- People from 6 to 20 years must practice this yoga. As, this can help in increasing stature.
- This yoga is best for back pain. Also, the pain in muscles, knees and feet is relaxed.
- Regular practice of Tadasana increases concentration.
Precautions.
- Those who have low blood pressure should avoid this yoga.
- Pregnant women should refrain from doing it.
- If your knees are having severe pain, you should not do this posture.
- Those who are doing this yoga for the first time should avoid doing it on the toes.
- Avoid if you have any heart problems or swelling and dizziness in the veins of the legs.
Surya Namaskar or Sun Salutation Pose.
There can be no better yoga other than surya namaskar to keep the body fit and healthy. This is a yoga that all parts of the body work together while doing it. It must practice in the order to reduce the stomach.
How to do Surya Namaskar or Sun Salutation Pose?
Step 1.
Stand upright on the yoga mat and place the hands in a salutation posture near the chest.
Step 2.
Now breathe and lift the hands up and sit near the ears and try to bend back.
Step 3.
Then bend on the abdominal force while exhale and try to lay the palms on the ground. Also try to touch the knees without bending.
Step 4.
Then take a breath and sit on the left foot and move the right leg back. Apply the right knee to the ground in this posture.
Step 5.
Now exhale and take the right foot back and lift the body from the middle. Try to touch your ankles with the ground in this posture and keep the arms straight.
Step 6.
Then breathe and lie down on the ground. At this stage, only the chin, chest and knee will touch the ground. Keep the stomach and hips picked up.
Step 7.
Now lift the upper part of the waist to the navel without breathing or leaving. The palms will remain adjacent to the ground.
Step 8.
Then exhale and raise the body from the middle and try to touch the ankles from the ground. At the same time, the palms will be straightened.
Step 9.
Then breathe and bring the left foot forward and sit down and keep the right foot straight. Land the right knee with the ground.
Step 10.
Now exhale and take the right foot forward and keep the palms from the ground and the forehead with the knees.
Step 11.
Then take the hands and body up while breathing and try to bend back.
Step 12.
Finally, come straight to the position of salutation.
Thus a cycle of sun salutation will be completed. You repeat 20-25 cycles at a time.
Advantages.
- Sun salutation reduces obesity and keeps the weight balanced.
- It is the best yoga to heal the digestive system.
- Doing this reduces physical and mental stress.
- This yoga activates the whole body.
- It leads to the exercise of all organs at once.
- If there is pain anywhere in the body, it gets away from the sun salutation.
Precautions.
- If you have a slip disc or have some kind of pain or discomfort in the knees, do not do this yoga.
- Give full attention to your breath while doing this. If you breathe wrongly, the benefits will decrease.
- Women do not do this during menstruation and during pregnancy.
- Children and patients suffering from hypertension and heart disease should practice under the supervision of specialists.
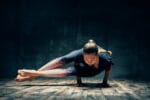
Naukasana or Boat Pose.
Naukasana is also called Boat pose in English. By running a boat, all the organs of your body are engaged. However, this position is a little harder than the other two pose and surviving in a naval posture is especially difficult that you can learn by studying slowly.
This yoga pose also strengthens your nervousness, bones and muscles and regular exercise will significantly reduce your lower back fat along with belly fat.
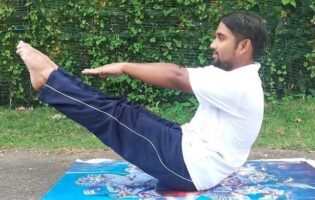
How to do a Naukasana or Boat Pose?
Step 1.
First lie down directly on the mat.
Step 2.
Now lift your shoulders up along the head.
Step 3.
Now lift your feet and shoulders too. But be careful to bend your legs. It should be firm while raising the foot.
Step 4.
In this situation your hands, feet and shoulders must be in a parallel line.
Step 5.
Now stay as long as you can in this situation. It is hard to stay in the situation that you can do through regular practice.
Step 6.
You have to repeat the same process 4-5 times and gradually increase this number.
Advantages.
- Stretches the hamstrings and quadriceps muscles.
- Strengthens the hip.
- Core and abdominal muscles become strong.
- Stretches the entire lower body.
- Stretches the muscles of spine and strengthens the spinal nerve.
- Aids in building a strong back.
- Improves the alignment of the whole body.
- Aids in improving digestion.
- Focuses on balancing the body.
Precautions.
Avoid practicing this pose if you have the following problems;
- Asthma.
- Diarrhea.
- Headache.
- Heart disease.
- Insomnia.
- Low blood pressure.
- Diabetes.
- Having surgery recently.
- If there is a stomach injury.
- Injuries in the knees, hips, hands and shoulders.
- In the beginning, practice under the supervision of a yoga trainer.
| Read Now: 14 Unexpected Health Benefits of Yoga |
Ardha Chakrasana or Standing Backward Bend.
This is also the yoga which comes in the category to reduce the stomach. In Sanskrit, Ardha which means ‘half’ and chakra which means ‘wheel’. While doing this posture, the body’s posture looks like half-wheeled, so it is called Ardha Chakrasana.
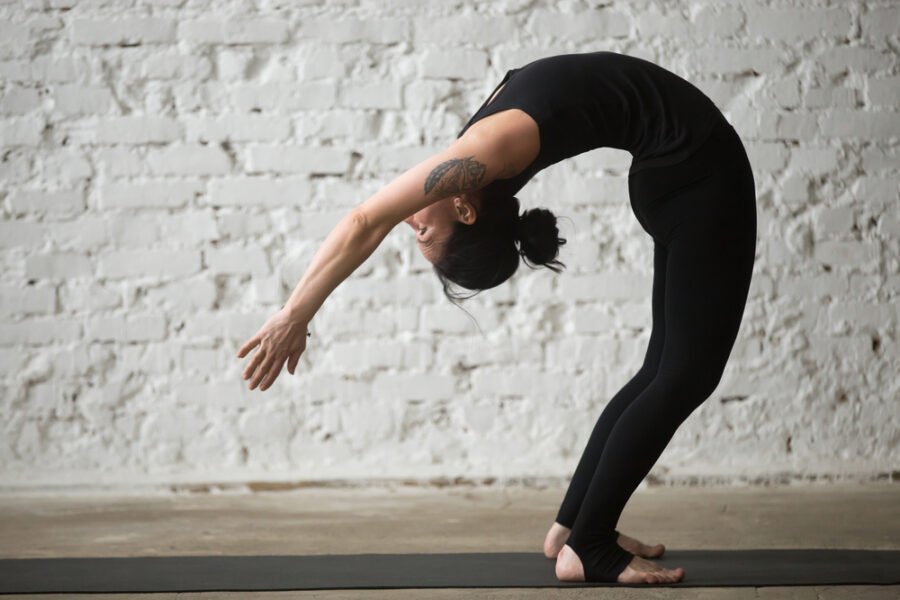
How to do Ardha Chakrasana or Standing Backward Bend?
Step 1.
Stand upright and keep the hands straight.
Step 2.
Now place the palms on the lower back by folding the elbows.
Step 3.
Then try to bend backwards as much as possible while breathing.
Step 4.
Stay in the same state as long as possible and keep breathing.
Step 5.
Then, exhale and come to normal condition. This posture can be done about three to four times at a time.
Advantages.
- By doing this yoga pose, the fat deposited around the belly gradually reduce.
- People who have diabetes can also do this posture. This keeps the level of insulin in the body balanced.
- This posture relieves neck pain and makes them flexible by stretching the back muscles.
- If you are suffering from groin pain and want to make the spinal cord resilient, do this posture.
- Those who sit for a long time should do this posture, so that the waist is relaxed.
Precautions.
- Do not blow the head and neck while bending back in this posture.
- Those who have a slip disc or a sciatica problem should do it under the supervision of an expert.
- It would be better, if you do not have a forward-bending posture after doing yoga.
| Read Now: 5 Top Yoga Poses To Cure Erectile Dysfunction |
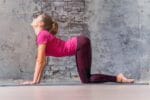
Chakki Chalnasana or Mil Churning Pose.
Just as the mill was run with the help of hands in the old times, this posture is also done in the same way. It is not difficult to do and anybody can do this pose.
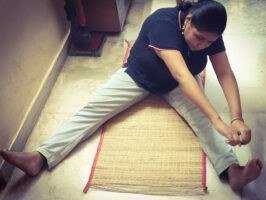
How to do Chakki Chalnasana or Mil Churning Pose?
Step 1.
First of all, sit on the yoga mat and spread the legs forward and keep it straight.
Step 2.
Now spread the two hands forward in the uprightness of the shoulders and make the fingers of both hands with each other.
Step 3.
Then bring the upper part of the body forward with a long deep breath and make a sphere while keeping the hands straight from the right to the left.
Step 4.
The body above the waist along with the hands will also continue to be right-left and back and forth.
Step 5.
First, do this process five to ten times in clock wise and then five to ten times in anti-clock wise.
Step 6.
Try to keep the feet stable and feel the stretch from the waist to the lower part.
Advantage.
- Doing this posture reduce the excess belly fat deposited on the abdomen, as well as burn the fat around the waist and hips.
- This yoga flexible hips and empowers the abdominal muscles.
- Regular practice relieves women from menstrual difficulties and pain.
- The muscles of the uterus of women are able to function properly.
Precautions.
- This posture should not be used during pregnancy.
- Avoid if you have low blood pressure problems or slip discs.
- Do not try if you have headaches or migraine.
- If you have a hernia operation, do not do this posture.
| Read Now: 6 Best Core Strengthening Yoga Poses |
Shavasana or Corpse Pose.
This is done at the end of all yoga, so that the body becomes calm and stable. While doing this, the body becomes like a dead body. It may seems easy, but it is equally difficult.
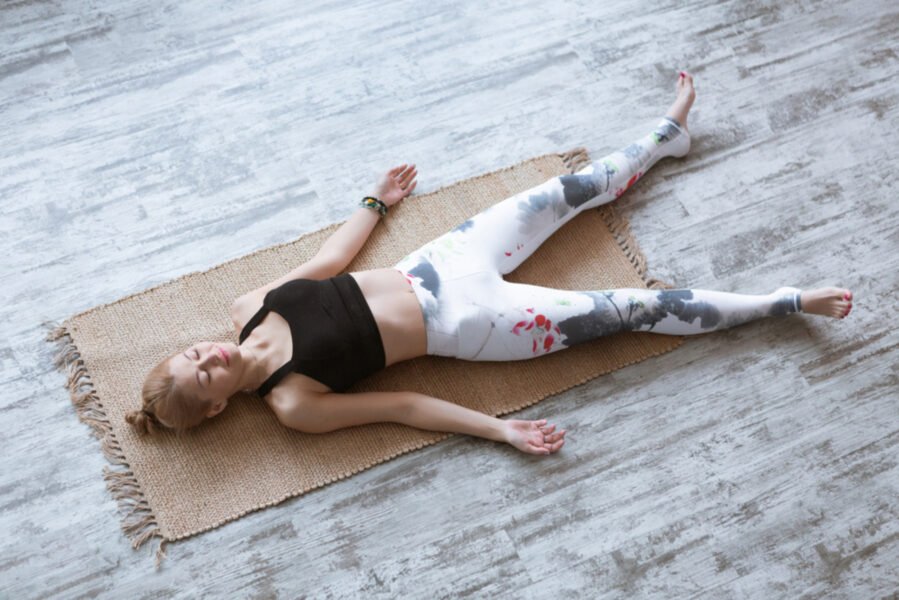
How To Do Shavasana or Corpse Pose?
Step 1.
After doing all the yoga, lie down on the yoga mat and close the eyes.
Step 2.
Keep a distance of one or two feet between the two legs and spread the hands slightly away from the body.
Step 3.
The palms should be in the upward direction.
Step 4.
Now slowly breathe and leave and keep the whole focus on the activities of the breath.
Step 5.
Then take your attention one by one to all the organs from the feet to the head and feel that you are getting rid of all kinds of stress. Every part of the body is getting rest.
Step 6.
Stay in the same state for a while and when it seems that the body has become stress free and the mind is calm, sit down on the left side and take recourse to the hands and gradually open your eyes.
Advantages.
- Shavasana is also a kind of meditation. While doing this, your mind becomes concentrated.
- Helps to relieve stress and promotes lightness in the body.
- Yoga helps to normalize the fatigue in the body and stretch the muscle.
- Those who worry highly or feel discomfort must do the same.
Precautions.
However, anyone can do it and doing it does not cause any harm, but it should be done under the supervision of an instructor for better results.
Frequently Asked Questions.
The following yoga helps to reduce upper belly fat:
Cobra Pose.
Bow Pose.
One leg downward facing dog Pose.
Boat Pose.
Camel Pose.
If yoga is practiced regularly then the changes about to start within two weeks. Meanwhile you will also able to feel stronger and thinner.
Bottom Line.
Whether you are physically or mentally disturbed, yoga is a solution for every problem. Yoga is beneficial for all disease. Also, keep in mind that yoga also helpful to reduce belly fat effectively, when you do it with full of confidence. So, do yoga regularly under the supervision of a good instructor.
Be healthy yourself and inspire others regarding yoga.
+5 Sources
Freaktofit has strict sourcing guidelines and relies on peer-reviewed studies, educational research institutes, and medical organizations. We avoid using tertiary references. You can learn more about how we ensure our content is accurate and up-to-date by reading our editorial policy.
- How to Have a Flat Stomach in 3 Weeks; https://www.jikonitaste.com/how-to-have-a-flat-stomach-in-3-weeks/
- Hamstring Muscles: Anatomy, Injuries, and Exercises; https://www.verywellfit.com/hamstring-muscle-anatomy-and-stretches-3498372
- Quadriceps femoris; https://www.healthline.com/human-body-maps/quadriceps#1
- Everything You Want to Know About a Hernia; https://www.healthline.com/health/hernia
- How to Meditate; https://www.mindful.org/how-to-meditate/